gaming pc build 2023
May 1, 2023
Pc part picker link: https://pcpartpicker.com/list/PkH3hk
parts #
| Type | Item | Price |
|---|---|---|
| CPU | Intel Core i7-13700K 3.4 GHz 16-Core Processor | $399.99 @ Amazon |
| CPU Cooler | Corsair iCUE H100i ELITE CAPELLIX 75 CFM Liquid CPU Cooler | $148.19 @ Amazon |
| Motherboard | Asus ROG STRIX B760-I GAMING WIFI Mini ITX LGA1700 Motherboard | $219.99 @ Amazon |
| Memory | Corsair Vengeance 64 GB (2 x 32 GB) DDR5-5200 CL40 Memory | $184.99 @ Amazon |
| Storage | SK Hynix Platinum P41 2 TB M.2-2280 PCIe 4.0 X4 NVME Solid State Drive | $156.99 @ Amazon |
| Storage | SK Hynix Platinum P41 2 TB M.2-2280 PCIe 4.0 X4 NVME Solid State Drive | $156.99 @ Amazon |
| Video Card | NVIDIA Founders Edition GeForce RTX 4080 16 GB Video Card | $1319.00 @ Amazon |
| Case | SSUPD Meshlicious (PCIe 4.0) Mini ITX Tower Case | $149.99 @ Amazon |
| Power Supply | Corsair SF750 750 W 80+ Platinum Certified Fully Modular SFX Power Supply | $162.54 @ Amazon |
| Prices include shipping, taxes, rebates, and discounts | ||
| Total | $2898.67 | |
| Generated by PCPartPicker 2023-05-01 23:03 EDT-0400 |
Those prices arent quite right (GPU was cheaper) but it’s close.
issues #
Original cooler was too large. Technically fit, but the AIO cables went straight out of the cpu and couldn’t curve sharply enough to let me put the side panel on. I replaced it with the Corsair, and added 15mm noctua fans.
The original 32 gig RAM kit was DOA. This gave me an excuse to upgrade to 64, although it did mean slightly lower transfer speeds.
build log #
This was a fun one, all told. The case is tight enough to add a bit of challenge, but the machine came together quite nicely. The case being nothing but mesh means even though it’s tightly packed, stuff stays pretty cool, and it’s great to have such a compact little machine.
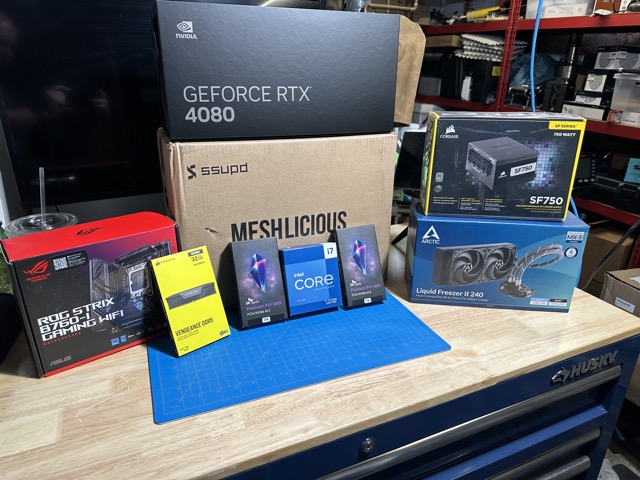
figure 1: gathering all the parts
It’s a handsome little case. The box for the GPU was larger than the box for the case itself, funnily enough.
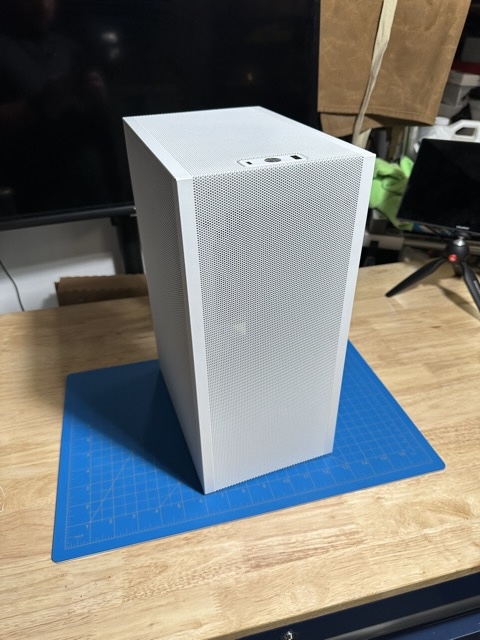
figure 2: such a cutie!
I had never used a pcie riser cable. It makes a ton of sense; being able to change the relative orientation of the GPU and the motherboard is a real gamechanger.
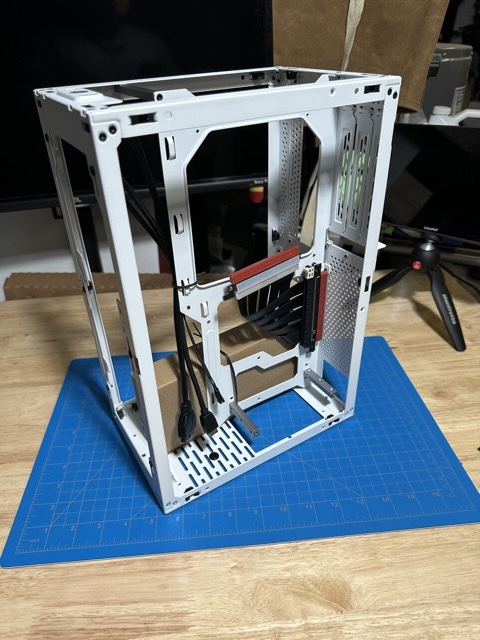
figure 3: all the mesh pops right off
I moved back to Intel for this build. My last system was a Ryzen, but I chose that because I was trying to move over to a Linux desktop and the Zen 3 chips were way better for productivity. I had also heard some concerns about the stability of the Ryzen 5000 (but also I guess there are issues with the 13th gen Intel as well, so I guess nowhere is safe), so I did an Intel/Nvidia build this time around and chose not to worry about Linux compatibility at all.
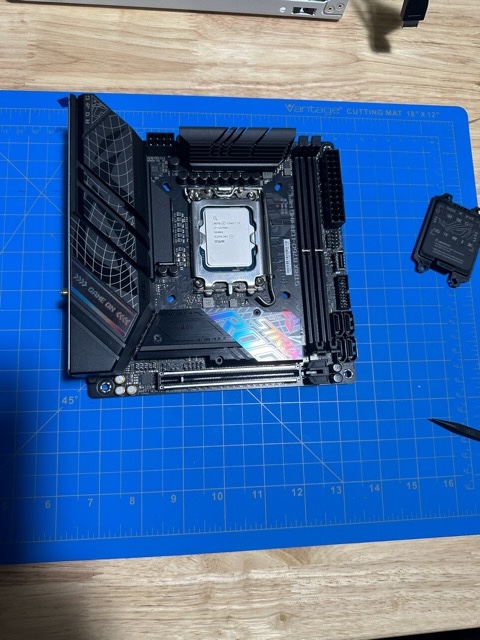
figure 4: mini ITX
As mentioned above, I went with a faster 32 gig kit to start, but that was DOA. I swapped to a 64 gig kit that I could pick up locally. Two 2 TB nvme drives take care of all things storage. It’s great how compact it all is; m.2 nvme drives are so tiny, and it’s really great having everything just connected right onto the motherboard.
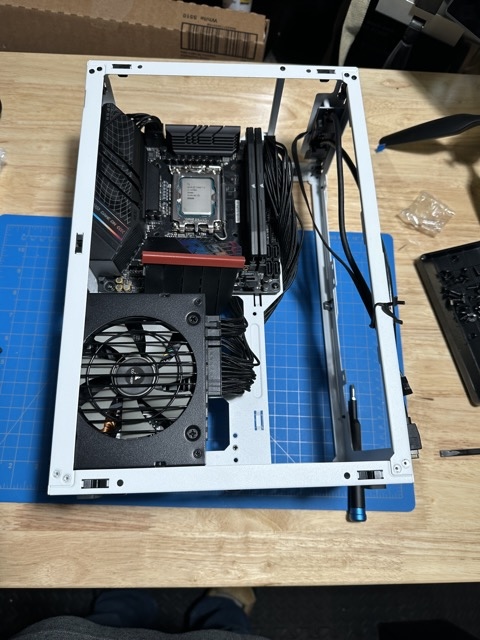
figure 5: almost a whole dang computer
Basically the entire chassis is filled by the GPU. I think a full on 4090 would fit in there, and I know the 4080 has a much worse price to performance, but it fit in my budget and gave me the best performance. I just couldn’t justify jumping up to a 4090 here.
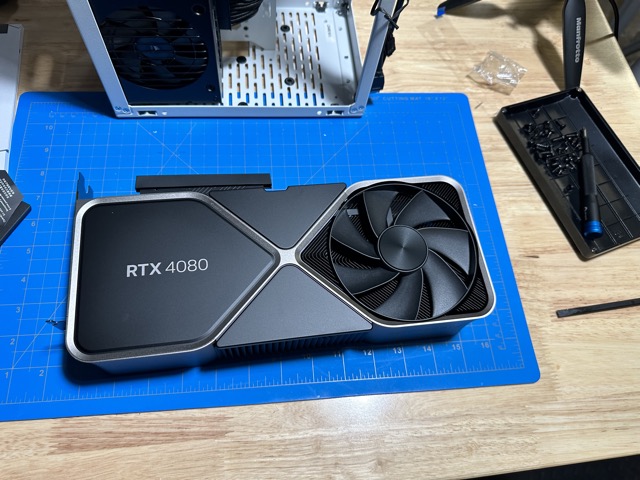
figure 6: man gpus are so big now
But it’s very slick to sandwich the motherboard and the GPU. Really makes optimal use of the minimal chassis space.
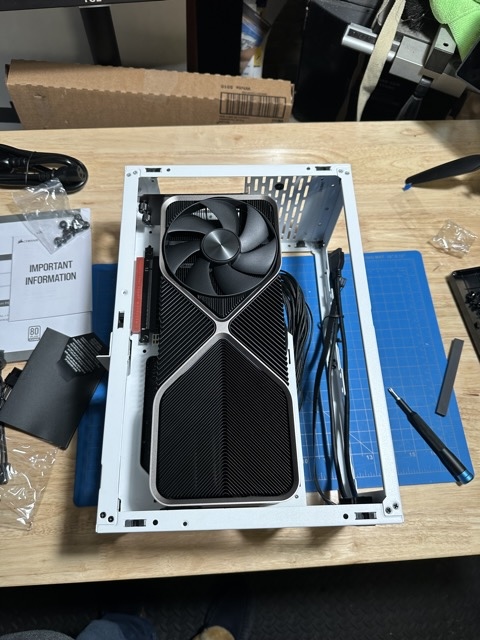
figure 7: delicious sandwich
I got all the way to the finish line, only to discover that, while my AIO technical fit inside the case, the cables running at 90 degrees to the motherboard meant I couldn’t close the side panel. Very annoying. Switching to the Corsair iCue fixed that problem, but I had to wait for it to ship. In the meantime, I could kick the tires a bit with a…sub optimal configuration.
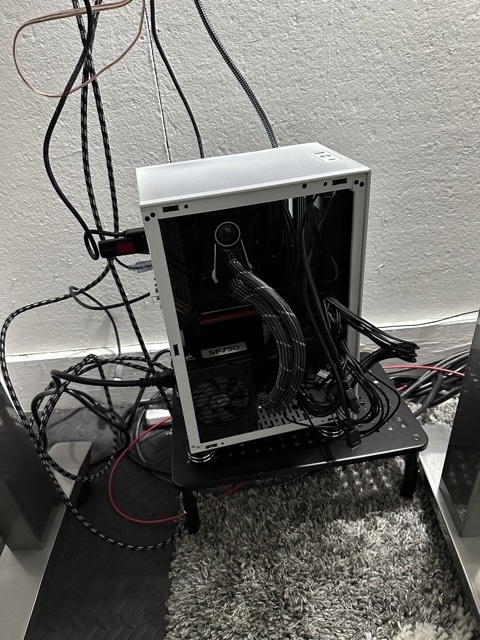
figure 8: peak performance
It buttoned up nicely in the end!
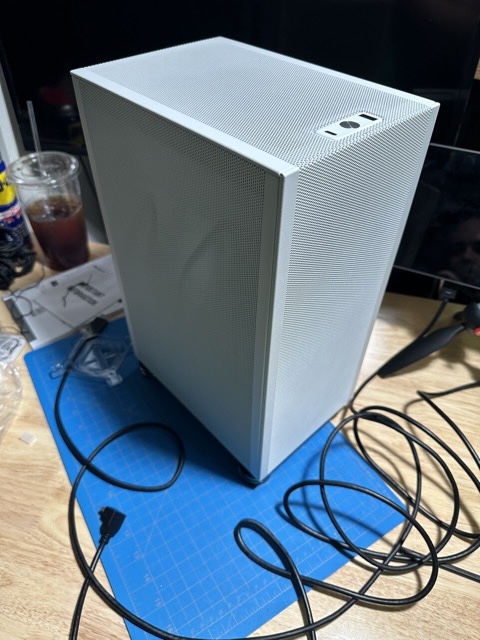
figure 9: completed
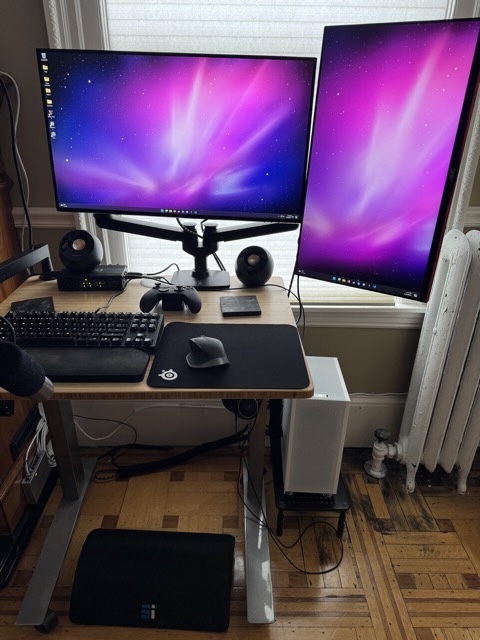
One annoying thing about this case is that it does require specific cabling and/or additional feet. Display cables all connect to the bottom of the machine, so they have to make a pretty sharp turn, and I had to be thoughtful about avoiding strain on the ports themselves. Short, right angle displayport whip cables made all the difference, alongside some small feet that I attached to the bottom with doublesided tape.

figure 10: one year later