macpro build - day 1
May 13, 2020
the machine #
It begins! First, we’ll verify our day 0 assumptions, and examine the machine itself.
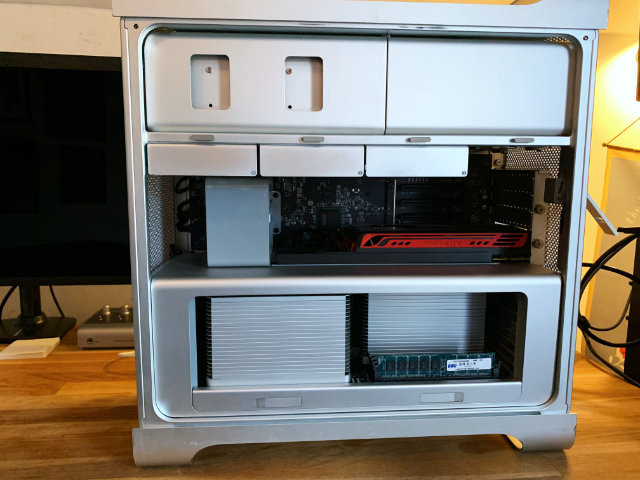
Figure 1: A first peek inside
All told, it’s cosmetically fine. I’d love a more pristine chassis (this guy has definitely been bounced off some rough corners), but it was relatively clean on the inside. I blew the machine out with compressed air and wiped down all of touchable surfaces before really cracking in.
(A small disappointment; it shipped with a generic power cable, and was missing a drive tray. I understand lots of shops find it easier to strip the whole tray out when decommissioning these machines, and keeping track of the original power cable is well beyond the purview of most IT shops, but I would have preferred to get all of the original components).
Starts up just fine the first time that I plug it in and hit the power button. All fans are rotating, optical drive seems to be fully functional as well.
clean install #
Let’s get ourselves a clean macOS installation first. We’ll follow the Apple kbase article here to create a USB 2.0 bootable installer. Booting to the installer works just fine and disk utility doesn’t complain about re partitioning the 1 TB internal HDD. I chose HFS+, since this is a rotational drive (I’ll use APFS for the NVMe installations).
Before I can reinstall High Sierra, I’m prompted for the first firmware update. It had been a long time since I last ran a firmware update on a Mac Pro; if you find yourself trying to do it, be patient - it takes longer than you might expect. The optical drive will pop open during the process (to allow you to pop in a CD with differing firmware, if I recall correctly), so keep an eye out for the opening and closing of the optical drive.
With the firmware update done and a fresh install of High Sierra completed, it’s time to log in and capture the specs of the machine.
the specs #
Of note here are the current boot ROM version. The machine can’t boot from an NVMe drive on this boot ROM, so we’ll need to run some more firmware updates before we get the actual macOS installation setup.
Hardware Overview:

  Model Name:	Mac Pro
  Model Identifier:	MacPro5,1
  Processor Name:	Quad-Core Intel Xeon
  Processor Speed:	2.4 GHz
  Number of Processors:	2
  Total Number of Cores:	8
  L2 Cache (per Core):	256 KB
  L3 Cache (per Processor):	12 MB
  Memory:	16 GB
  Boot ROM Version:	MP51.0089.B00
  SMC Version (system):	1.39f11
  SMC Version (processor tray):	1.39f11
  Serial Number (system):	<REDACTED>
  Serial Number (processor tray):	<REDACTED>
  Hardware UUID:	<REDACTED>


ATI Radeon HD 5770:

  Chipset Model:	ATI Radeon HD 5770
  Type:	GPU
  Bus:	PCIe
  Slot:	Slot-1
  PCIe Lane Width:	x16
  VRAM (Dynamic, Max):	1024 MB
  Vendor:	AMD (0x1002)
  Device ID:	0x68b8
  Revision ID:	0x0000
  ROM Revision:	113-C0160C-155
  VBIOS Version:	113-C01601-103
  EFI Driver Version:	01.00.436
  Displays:
24G1WG4:
  Resolution:	1920 x 1080 (1080p FHD - Full High Definition)
  UI Looks like:	1920 x 1080 @ 60 Hz
  Framebuffer Depth:	24-Bit Color (ARGB8888)
  Main Display:	Yes
  Mirror:	Off
  Online:	Yes
  Rotation:	Supported
  Automatically Adjust Brightness:	No
  Connection Type:	DisplayPort


Memory Slots:

  ECC:	Enabled
  Upgradeable Memory:	Yes

DIMM 1:

  Size:	8 GB
  Type:	DDR3 ECC
  Speed:	1066 MHz
  Status:	OK
  Manufacturer:	0x857F
  Part Number:	0x463732314755363746393333334700000000
  Serial Number:	-

DIMM 2:

  Size:	Empty
  Type:	Empty
  Speed:	Empty
  Status:	Empty
  Manufacturer:	Empty
  Part Number:	Empty
  Serial Number:	Empty

DIMM 3:

  Size:	Empty
  Type:	Empty
  Speed:	Empty
  Status:	Empty
  Manufacturer:	Empty
  Part Number:	Empty
  Serial Number:	Empty

DIMM 4:

  Size:	Empty
  Type:	Empty
  Speed:	Empty
  Status:	Empty
  Manufacturer:	Empty
  Part Number:	Empty
  Serial Number:	Empty

DIMM 5:

  Size:	8 GB
  Type:	DDR3 ECC
  Speed:	1066 MHz
  Status:	OK
  Manufacturer:	0x857F
  Part Number:	0x463732314755363746393333334700000000
  Serial Number:	-

DIMM 6:

  Size:	Empty
  Type:	Empty
  Speed:	Empty
  Status:	Empty
  Manufacturer:	Empty
  Part Number:	Empty
  Serial Number:	Empty

DIMM 7:

  Size:	Empty
  Type:	Empty
  Speed:	Empty
  Status:	Empty
  Manufacturer:	Empty
  Part Number:	Empty
  Serial Number:	Empty

DIMM 8:

  Size:	Empty
  Type:	Empty
  Speed:	Empty
  Status:	Empty
  Manufacturer:	Empty
  Part Number:	Empty
  Serial Number:	Empty
We’re definitely not running the stock RAM (the OWC sticker in the earlier picture was a bit of a tip off there), but it’s good to hang on to some known good memory for slot testing and troubleshooting. Ultimately, the goal is to be able to isolate any failures component by component, following the flow of signal and power, until the source of any problem is obvious. The 8 gig OWC DIMMs can serve that purpose quite well in the future.
baseline performance #
Let’s capture what this machine can do before we start improving it. I’m going to use synthetic benchmarks as a short hand for performance because it’s simple and straightforward; actually computing performance is anything but that. At some point I’ll probably write up my performance testing manifesto, but in the mean time, I’m going to say this: synthetic benchmarks can be a useful shorthand for some performance characteristics in well understood problem spaces. I’m going to use them here because it’ll be fun to see the numbers go up.
geekbench 5, cinebench 20 #
Sitting next to the machine while it runs the Geekbench 5, I’m struck by how little change there is in the pitch and volume of the fans. It’s not a silent machine by any stretch of the imagination, but it’s a consistent white noise that’s not particularly distracting. It’s not a long test (4 or 5 minutes to complete), so that could certainly change if it ran for longer, but all told, a good first impression for usability during compute tasks.
Note again this is running with the original pair of Xeon 5620’s (2 processors, each with 4 cores and 8 threads) with 16 gigs (2x8) of 1066 MHz DDR3 memory. The graphical benchmarks will be testing the ATI Radeon HD 5770.
| Benchmark | Result |
|---|---|
| Geekbench 5 CPU, Single Core | 485 |
| Geekbench 5 CPU, Multi Core | 3160 |
| Geekbench 5 Compute (OpenCL) | 1005 |
| Cinebench | 1640 |
Nothing surprising there. Our single core performance is pretty dismal. Multi core performance puts us just below the 4 core 8 thread 2.6 GHz Intel Core i7 6700. Graphical performance…makes sense for a card from a previous decade.
stability and load #
I’d like to check out the general stability of the machine as well, before I
start making changes and introducing potential chaos. My stability checks here
are pretty simple; I’ll open up eight instances of terminal, each redirecting
the yes command to /dev/null. That’ll keep threads of execution running at
clock rate along each of the eight real physical cores. And I’ll just leave
that running. Ideally, we won’t hear a huge change in fan volume (if I were
really good about this, I’d actually measure the ambient and specific volumes
during this test, but considering the myriad of other noises in and around my
home, I’m totally comfortable with the less scientific approach of playing it by
ear), and the machine should be responsive throughout the test.
All told, I let this run for about 6 hours, hopping on occasionally to open a browser window or move some Finder windows around. No issues with responsiveness and it was still running just fine at the tail end of it. Not necessarily a perfect bill of health, but a pretty good indicator of stability. Funnily enough, my work laptop (2015 15 inch Macbook Pro) is louder running builds than the Mac Pro.
installing the rx 580 #
This machine has such lovely little touches. The PCI card locking bar, controlled with a button press from an enclosure around the central system fan is quite clever. And of course, the PCI slot cover plate has good sized, grippable thumb screws (and they’re captured! why would they not be?) that really put to shame so many other generic cases. I understand that case design and ergonomics have been improving in general in the PC industry, but many of the machines that I’ve worked on before had terribly fussy screws holding the PCI slot covers in place. This simple place is such a nice touch.
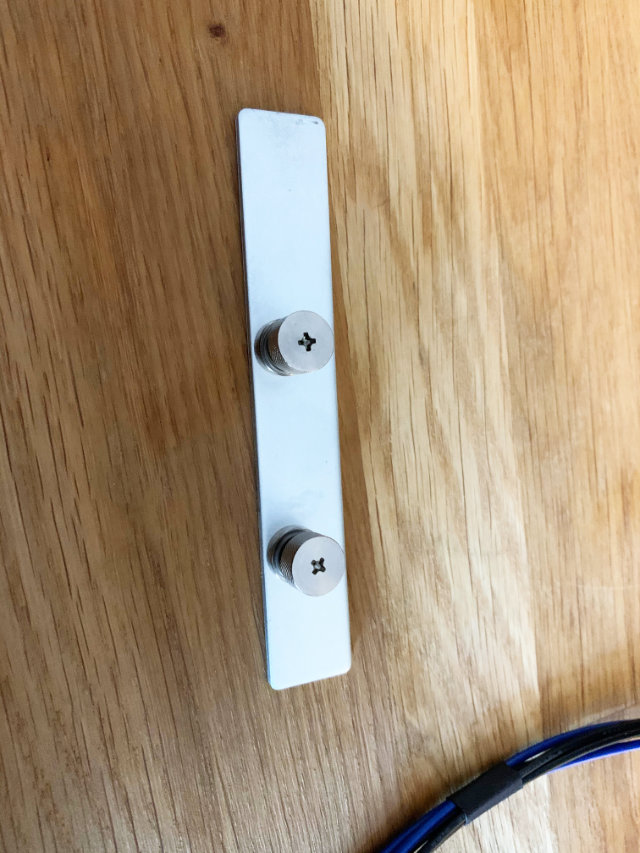
Figure 2: Easy to turn by hand, with Phillips slots for undoing overzealous tightening
Power for the RX 580 is an easy story. Just replace the 5770’s mini six pin to six pin with a two mini six pin to eight pin cable.
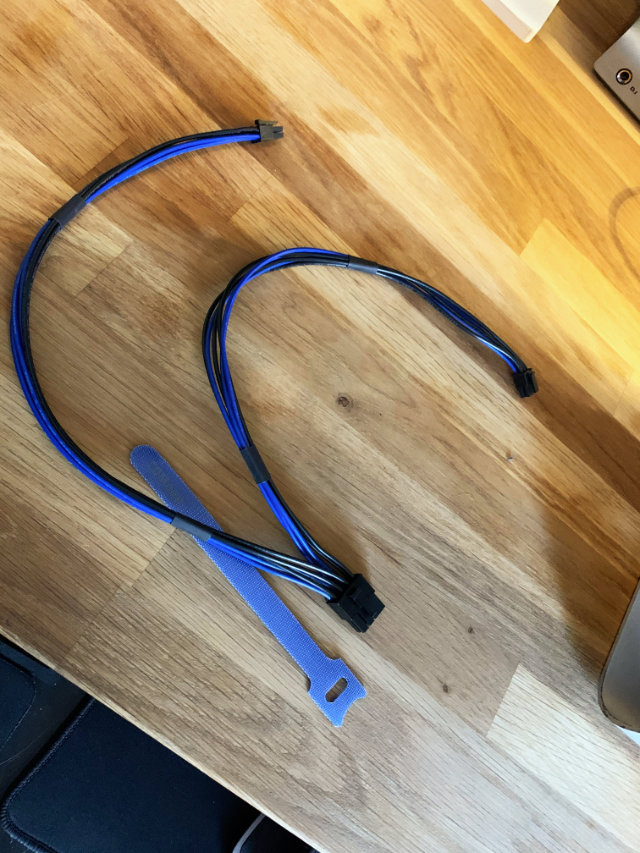
Figure 3: Two mini six pin to eight pin cable
Out comes the 5770
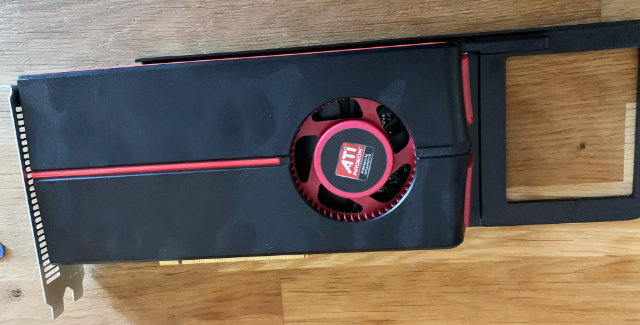
Figure 4: ATI Radeon HD 5770
And in goes the RX 580
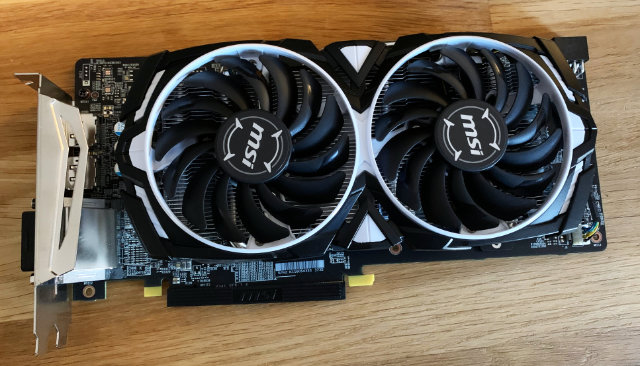
Figure 5: RX 580
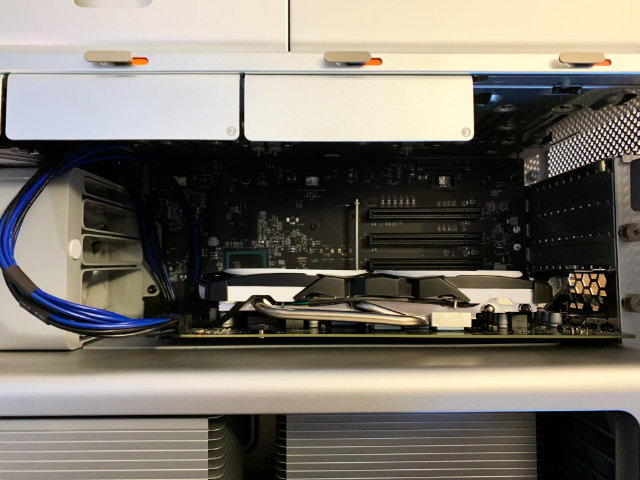
Figure 6: The installed 580
I’ll confess, I’m a little concerned at this point about airflow. Looking at the NVMe card, it’s going to be flush right up against the RX 580. Heat might be a concern here.
firmware updates #
Now that there’s a Metal capable GPU installed, the Mojave installer will launch (without a Metal capable GPU, the unpatched installer won’t run). I’m not actually interested in the install at this point, since we’ll be installing to the NVMe drive, but the firmware updater is bundled into the 10.14.6 combo installer.
Since the RX 580 isn’t mac flashed (this era of Macs ran non standard extensible firmware interface (EFI), not to be confused with the now ubiquitous UEFI. The generic RX 580 doesn’t know how to display video during the EFI stage of booting, so no video at the boot prompt), I’ll be flying blind here. Flashing power LED, long tone, and the optical drive opening and closing are the only indicators to the process.
Coming back into the operating system, we’ve got the right firmware now to boot from an NVMe drive.
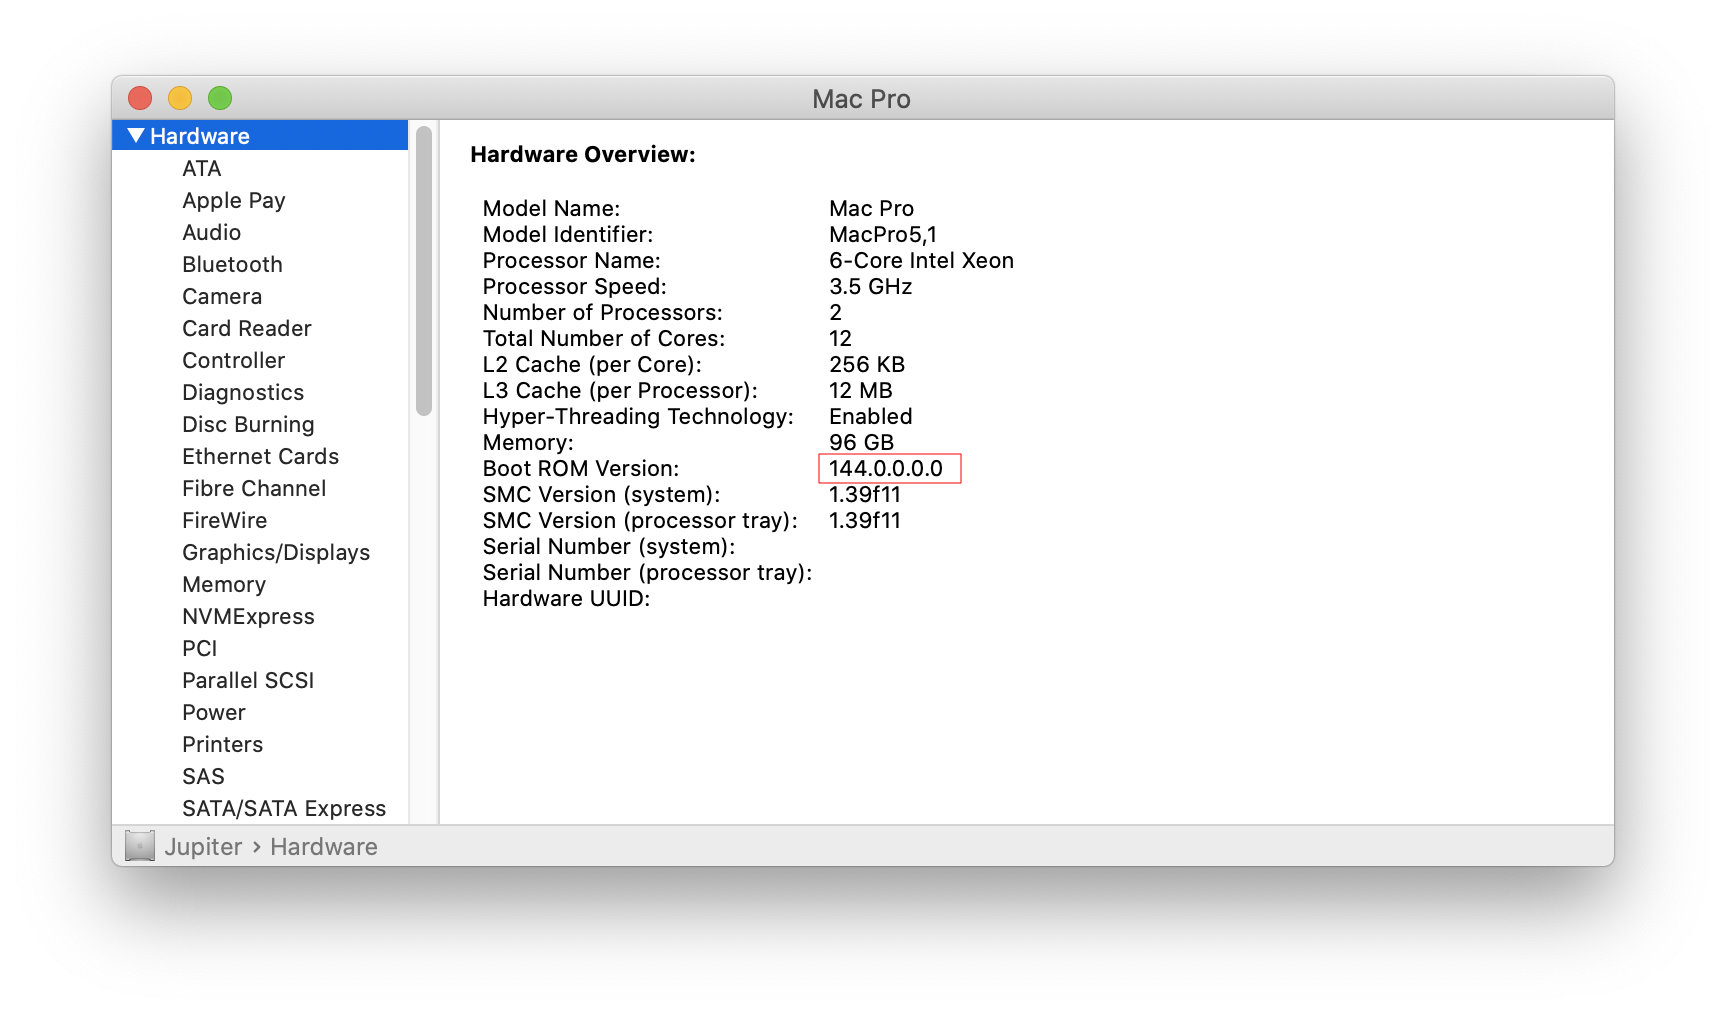
Figure 7: The sharp eyed reader will see upgraded CPUs and memory here; I had to take this screenshot after the fact
Now it’s time for the NVMe cards and the real Mojave installation.
nvme card #
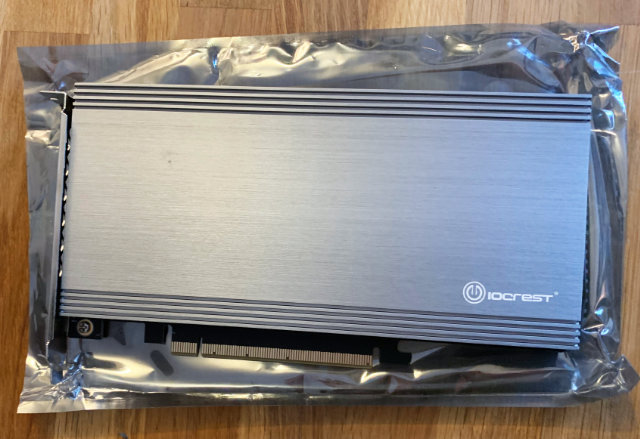
Figure 8: Syba I/O Crest
These are some positively tiny standoffs. Screwing them in from the bottom is fussy work. There may or may not have been a few frantic minutes waving a flashlight across my floor to find the telltale flicker of a dropped standoff screw.
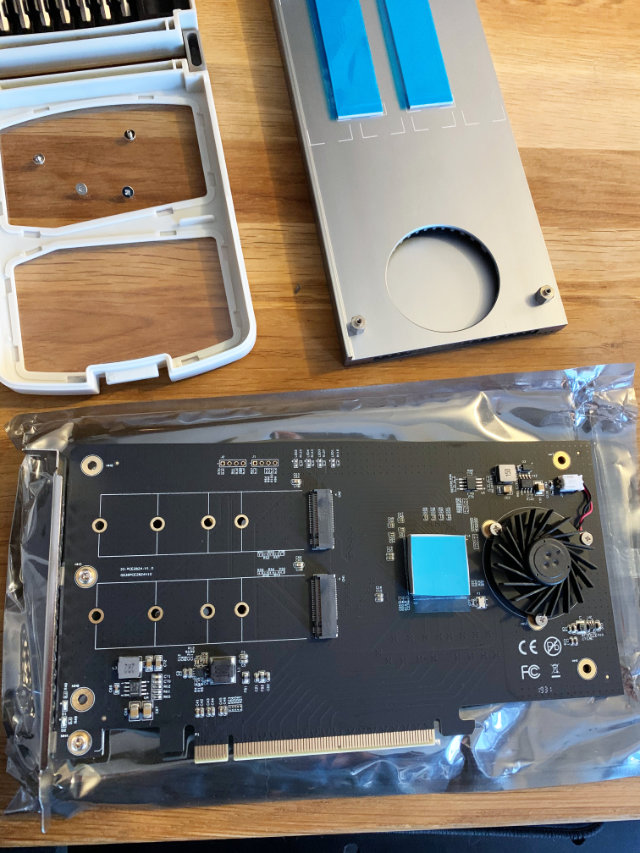
Figure 9: Look at how tiny they are!
I foolishly thought that using the provided screw driver was a good idea. Definitely not. Switching to a real magnetized jeweler’s set made getting the m.2 drives installed much easier.
It’s a tight fit against the RX 580. They are cheek to jowl in there, and I’ll need to keep an eye on temperatures.
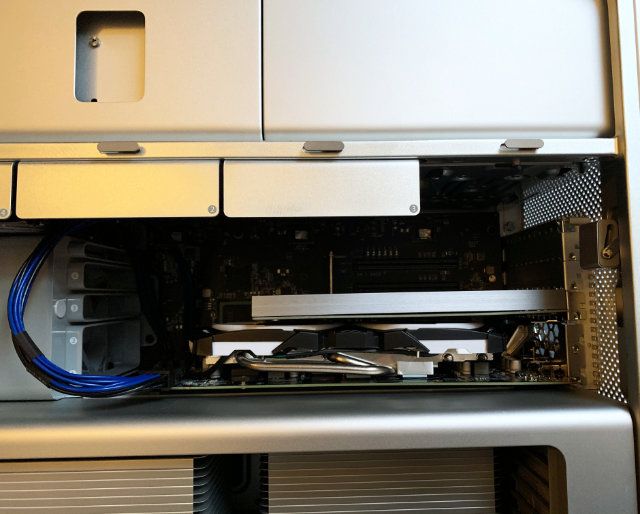
Figure 10: The Syba installed
Both drives are recognized immediately. A quick trip to disk utility leaves us with a GUID partition scheme for an APFS volume that will serve as the target of the Mojave installation.
Nothing eventful to the install; kick it off, get some coffee, and come back to a clean install of Mojave.
At this point, I’m done with the original 1 TB rotational drive (at close to 10 years old, I wouldn’t want to rely on it for anything). I’ll put it in my big box of just-in-case parts for the Mac Pro joining the 5770, to be dusted off in case of a need to return to High Sierra.
revisiting gpu performance #
With the newly installed card, let’s take a loot at the changes in GPU performance.
| Benchmark | Result |
|---|---|
| GeekBench 5 Compute (OpenCL) | 39043 |
| GeekBench 5 Compute (Metal) | 42658 |
Almost a 40x improvement; not too shabby at all.